Setting up your class and any possible subgroups is the first step to using Teacher Tools.
- Adding a new class
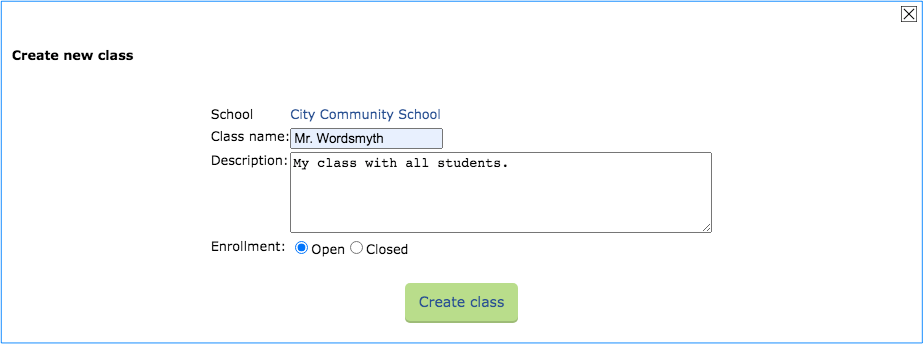
On the “Classes” page, click “New.” Then name the class and add a description if you’d like. The enrollment option “Open” means that students can register themselves after you have created the class. “Closed” means that students cannot register themselves and you will add students to your class manually. After choosing your enrollment option, click “Create class” and your first class will be ready for registration.

- Managing the class
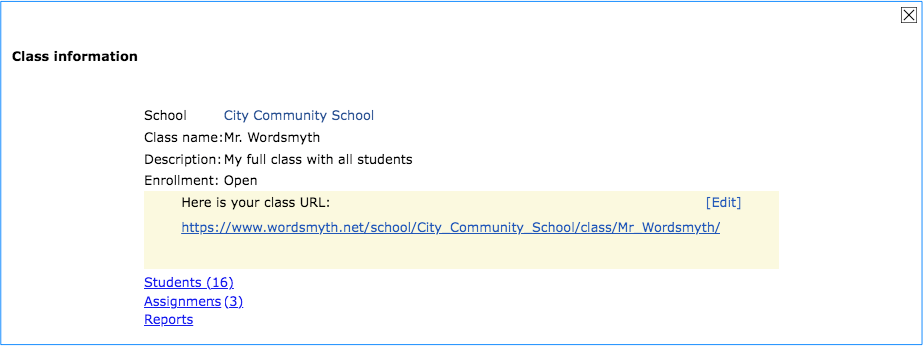
Each saved class has a specific class URL. This URL is the entry point for your students. Right now your new class is empty. Click on the class name to open its class information window as shown below. Now you will see your class URL.
Here you can edit your class information, including the wording of the class URL, and add students manually if you’ve opted for “closed” enrollment. When you’ve finished setting up your class, you can assign lessons to your students and view reports. - Adding a subgroup of students as a new class
After creating the first class that contains all of your students, you can create additional classes for selected groups of students, such as students in an ESL program, so that they may receive special support. This allows you to tailor your students’ assignments to the needs of particular groups.
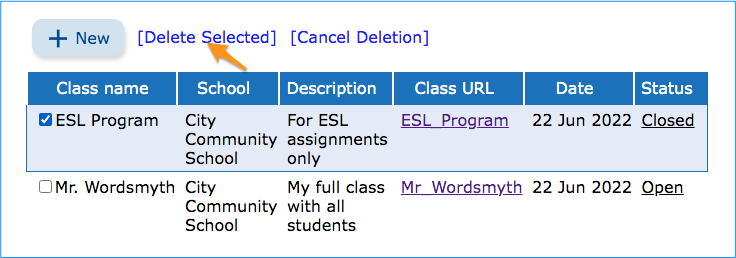
- Deleting a class
Click on “Delete.” Then select the class you want to delete by checking in the checkbox next to its name. Then click “Delete Selected.”
- Using the filter
Most teachers will not find it necessary to use the class filter. However, if you teach at more than one school or have created classes using the Wordsmyth URL rather than a school URL, you can see all your classes by selecting “All” under “Set Filter.”


Share the Quick Start Guide for Students to help your students get started.